
My kids think it’s quite a lark to add goofy words to the spelling dictionary in Microsoft Word on my MacBook Pro, which I don’t mind except now I find that some of the words that I commonly misspell aren’t be flagged as misspelled either. Not good. How can I clean up Microsoft Word on my Mac so that it doesn’t have bogus words?
Now you know why you should prohibit your kids from touching your computer. It’s those unintended consequences from their curious fingers and amused minds that can getcha in the end!
Fortunately, once you know the secret way to get to the file, you can actually edit your Microsoft Word spelling dictionary on your Mac OS X system pretty darn easily.
let’s start by adding a bogus word to the spelling dictionary by choosing Add from the pop-up contextual menu that you can get by Control-clicking on a word that has a little red squiggly line underneath:
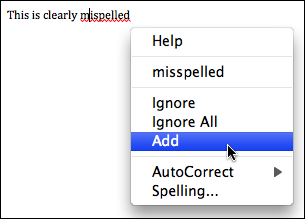
Now that you’ve added it, the red squiggle goes away. But, really, you know that the word is properly spelled “misspelled”, not “mispelled”, right? Let’s fix it!
Start by going to Word –> Preferences. You’ll see this:
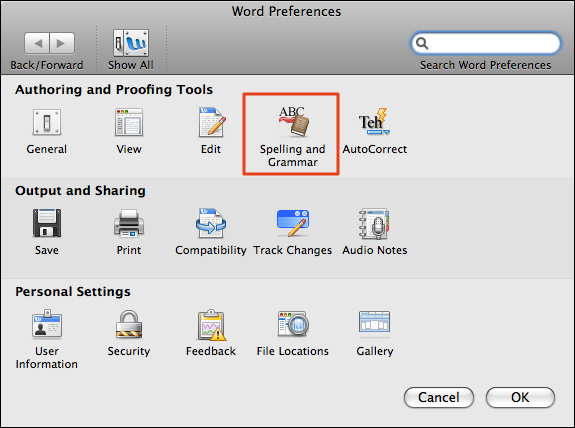
What you want to click on is “Spelling and Grammar”. Now you’ll get this view instead:
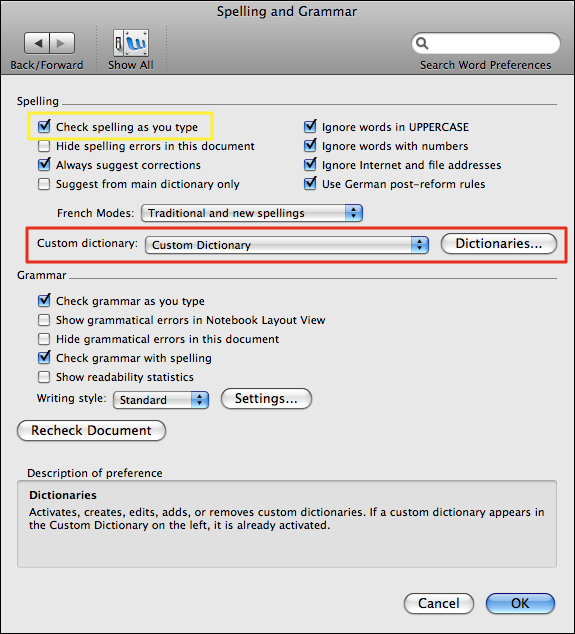
A big window with lots of choices. What you need to do is select “Custom Dictionary” in the middle (as I have here, and highlighted in red) then click on “Dictionaries…”
Next window looks like this:
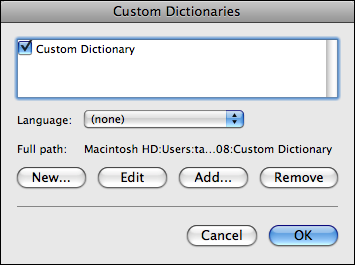
You can probably guess what to do. Click on “Custom Dictionary” in the list to select it, then click on “Edit”. Now, finally, you’re looking at your list of words that you believe are spelled correctly but aren’t in the standard MS Word dictionary:
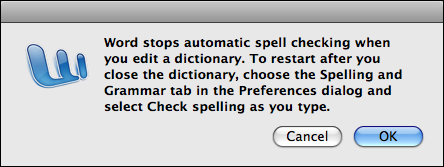
Oops. Um, okay. Click “OK” here to proceed.
You’ll end up looking at a Word file that has the words listed one-per-line. Find the ones you don’t want included, delete them (delete the entire line to save problems), then just File –> Save the window and you’re done.
Now let’s turn that spell checking feature back on since it does indeed end up disabled after editing the custom dictionary (which is a bit daft). That’s done by going to Word –> Preferences, choosing “Spelling and Grammar” and then checking “Check spelling as you type” on the top left corner (see the screen shot above, where it’s highlighted in yellow).
Now ya know!
I have done this repeatedly but the misspelled word is never gone; it just keeps coming back — so — anything else?
I’ve seen this too, unfortunately. I just think it’s buggy. 🙁
When I tried to do this, and clicked on Edit. Instead of list of words i get a file conversion window. If i click on okay assuming i needed to just go past it, it goes back to previous window. I can never get to the list to edit it. What can i do?
Worked like a charm. Thanks!
Thanks sooo much!! I have a bunch of long complicated words for classes where I’m never going to use these words again but unfortunately when I mean to hit ignore all I accidentally hit add.
Might want to add that you’ll be prompted to convert the file from Unicode Text, and then presented with a dialog with Unicode 6.0 (Little-Endain) selected for you.
Thank you so much for sharing how to remove items from the Word dictionary. Very helpful in my line of work, medical transcriptioning. Thanks.
This is an extremely useful tip, and very well-presented. Thank you for making the Internet a little bit better and your readers (now including me) a little bit smarter!
I need daily free updates of dictionary words to my email id..For that what should I do.?
I inadvertently okayed 2 misspellings (NB the “Add to Dictionary” option is directly beneath the correctly-spelled word option — not a good arrangement when you’re typing faster than you’re looking!). I followed all the steps and found that last window with the document-style page. However, it lists only 3 words which I need to keep. The 2 misspelled words do not appear. Does this mean they are in another dictionary on my computer?
that’s a good solution.
thank you.
I’ve always wondered about that! Thanks!