It’s one thing to share a slide deck with someone, but it’s always better to have it narrated. For the best impact, record yourself on camera presenting your slides. It’s built-in to PowerPoint!
The introduction of PowerPoint in 1987 (originally from a little software company called Forethought, then acquired by Microsoft) was a huge step in presentations, both business and academic. Instead of struggling with clumsy graphics programs, people now had a single unified program that allowed both the creation, ideation, design, and actual presentation of one or more slides. Since then millions of presentations have been shared both in person and online.
This has also spawned an entire generation of painfully dull and boring presentation decks too (a “deck” is a set of slides in PowerPoint parlance). In fact, there are some funny articles and videos you can find by searching for death by PowerPoint if you want to see some horrible presentation slides. But even with the most aesthetically pleasing slides, it’s quite difficult for someone to receive a deck and not get bored stepping through the various slides.
Shortcuts: Add a Cameo | Inset Window Setup | Recording Your Presentation | Export Tips
That’s why Microsoft’s added two great features to the program – Mac and Windows – that let you record yourself presenting your slides and share the recording. The easier version is audio only, but the real winner is something called Cameo, which allows you to add a recording of you talking through your presentation, as recorded from your webcam. It was introduced back in 2021 as part of Office 365, but few people know about it. Let’s remedy that with this tutorial!
FINDING CAMEO IN MICROSOFT POWERPOINT
The first step is to ensure that you have the latest version of Microsoft PowerPoint. Don’t have the app? No worries, PowerPoint online as part of Office365 also has this feature if that’s your preference. I have PowerPoint for Mac (version 16.90.2) so that’s what I’ll use for this tutorial. The “Insert” tool ribbon looks like this:

Notice the fifth icon from the left: “Cameo“. That’s what we want, so I’ll click on it. This brings up a new ribbon with entirely different features and controls:

It’s actually the “Camera Format” ribbon and it has lots of features but what’s not obvious is how to actually begin the recording itself. That’s the “Record” button along the top right, but before we record, I need to actually set things up…
SETTING UP THE CAMEO INSET WINDOW
Start by clicking on the Camera Preview icon on the very left edge. This will list all known webcams and other video input sources on the computer. I have my iPhone setup as a remote camera option too, so I get three possibilities:
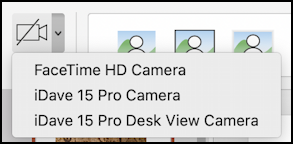
I’ll choose “FaceTime HD Camera”, the default webcam on my MacBook Pro. Next up, the inset window style. There are a surprising number of choices, as you can see by clicking on the expand “v” button:
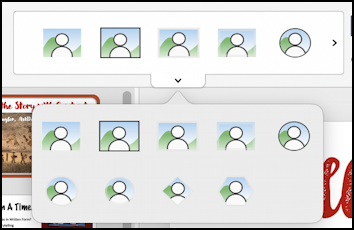
You don’t have to stop there, though! If those dull rectangles and circles are too dull, click on the shapes button on the Camera Format ribbon and you’ll find that there are a lot of different shapes you can utilize:
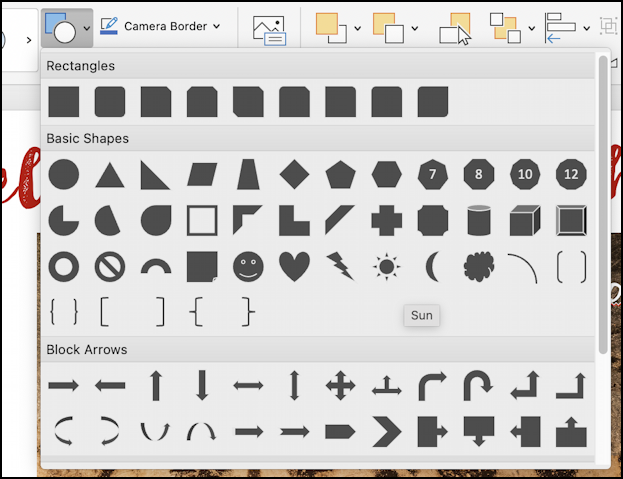
Purely in the spirit of excess, I’m going to click on the “sun” icon to have that as my inset shape.
But there’s more! You can also add a shadow, reflection, soft edge, or glow in any of a half-dozen colors through the Camera Effects menu:

Of course, simple is always best, so in reality I would strongly encourage you chose a simple circle or rectangle tucked into a corner, but ya gotta admit, this is pretty fun:
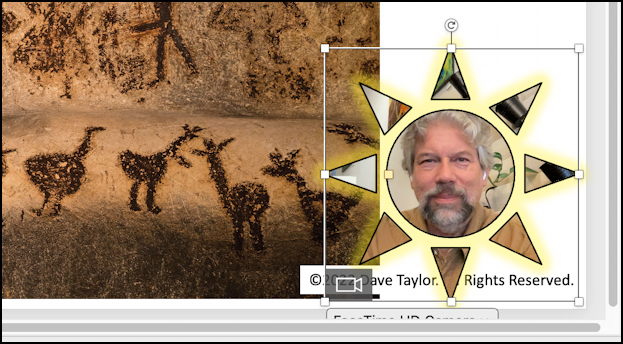
There might be some instances when it makes sense. Might. Better is to just simplify things down to that circle inset…
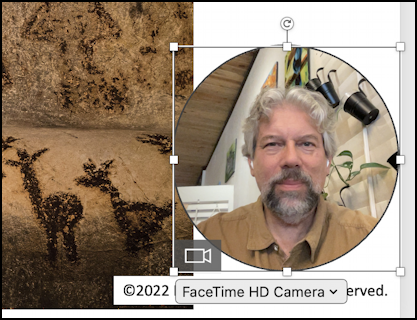
Notice you can click and drag to move it around on the screen and use the various sizing handles to resize it too. This can help you ensure that it’s not covering any of the content of your slides too.
RECORDING YOUR PRESENTATION
Ready to try recording? Easiest is to click on the “Record” button on the tool ribbon. The first time you use Cameo it’ll include this cheery splash screen:

When you’re ready to proceed, click on the “Let’s get started!” button.

What’s fantastic about this view is that you can see what it’ll record (the slide + inset) but you can also have additional text shown that won’t be part of the presentation but can cue you to specific points and ideas. These notes can also show up in Presenter view for when you’re actually presenting live and in person too. Well worth trying out and utilizing!
Check the framing of your webcam, make sure the mic is positioned correctly as needed, and click on the red circle REC button along the top control ribbon. It will start recording and change to:

When you’re done recording the current slide, click on the red box icon. Or you can simply go through your presentation by using the “>” next slide button at the bottom of the screen while it remains in record mode. The latter is easiest if you’re comfortable with the process, though you’ll want to finish what you want to say about each slide and give it a few seconds of silence as you move to the subsequent slide. Experiment, you’ll see what I mean.
Once you’re done recording, you will see that the preview box has changed to a playback box:

Click on the Play triangle and watch your presentation. Did it work? Does it advance slides at the right moment? Have you organized the information on your slides so that your inset isn’t covering up anything important? Great!
BONUS: HOW TO SAVE YOUR RECORDING AS AN MP4
A lot of people will save the recording without going any further, which produces a really big PPTX file from Microsoft. Not always the most portable format and sometimes it requires that the viewer advance each slide manually (even with the additional recorded content). Confusing. Much better is to save it as a MOV or MP4 file, which is easy to do!
Choose File > Export… (tip: File > Save As… won’t offer the same options, you need to export the presentation). Here’s the Mac version of this export window:

Obviously, the filename and location are important, but what’s equally important in this instance is the file format. Click on “PDF” and you’ll see that there are a bunch of possibilities:

Yes, you can ostensibly save your presentation as an Animated GIF! But… for actual sharing, I recommend either MP4 or MOV, both of which are portable across operating systems. Choose MP4, for example, and some other options appear:

In almost all cases, HD (720p) is a good compromise between being big enough to look good full-screen (or projected) without creating an enormous file that becomes difficult to manage. Before you finish up, the last few entries prove quite important: Enable “Use Recorded Timings and Narrations” to have it move to subsequent slides when you’re done with your narration. For any slides that don’t have a recording, it’s a smart idea to add a default timer so that the entire presentation moves along at a known pace. Set the “Seconds spent on each slide without a set timing” to whatever you prefer and click “Export“.
Done. You’ve now taken your beautiful slides and narrated them, with you as a video inset, and exported it as an MP4 or MOV file. Well done!
Pro Tip: I’ve been using and writing about Microsoft’s Office Suite for many years. Please check out my PowerPoint help library for plenty of useful tutorials, as well as additional Office help pages! Thanks.
