
I like to view the photos I’ve taken on a map so I can compare them in a location across visits. But sometimes my iPhone gets confused about where photos were taken! Is there any way to change or update the location to fix this problem on specific pictures?
Generally, the geolocation information that your smartphone saves as part of your photographs tends to be pretty darn accurate. But sometimes, as you note, it can get confused for various reasons, in the same way that sometimes it puts you in the wrong location when you check Maps. 99% of the time it’s not a big deal so we tend to just move past it, but with photos, it can be annoying if you’re at, say, the Taj Mahal and your iPhone thinks you’re two miles away at a local shopping haat.
Fortunately, this is something you can indeed update as desired. This also means that you can take a photo in front of the Paris Hotel & Casino in Las Vegas and change it to be the real Eiffel Tower in Paris, France if you want to have a little fun! For this tutorial, however, let’s focus on fixing incorrect geoloc information…
FUN PHOTO, WRONG LOCATION
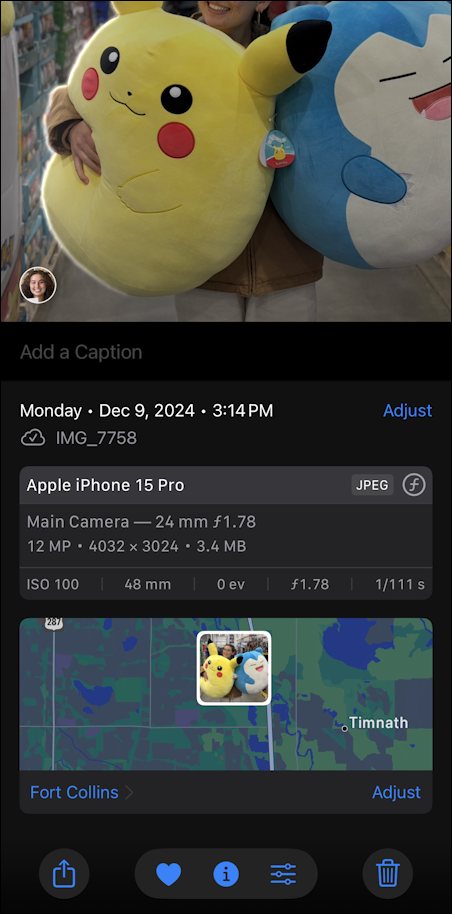
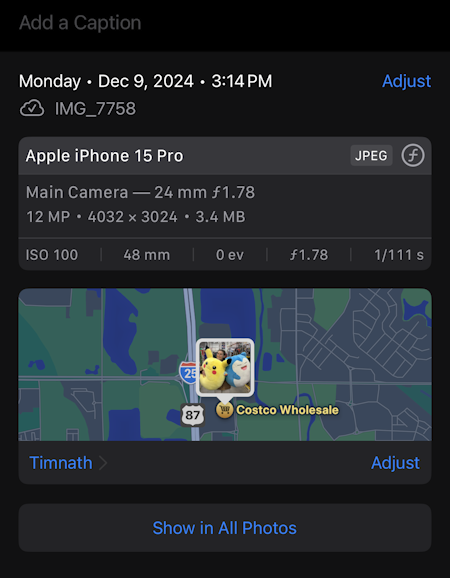
My daughter and I were shopping in Costco just outside of Fort Collins, Colorado, when she came across these enormous Pokemon stuffies. As a lifelong fan, she couldn’t resist a quick hug, and it’s a fun photo:

It’s categorized as a photo from location “Fort Collins”, as can be seen at the top. If I tap on the “i” link on the bottom to get more information about this image, there’s lots more techie photography information and an indication of where the photo was taken on a map:
A tap on the map and it becomes quite a bit bigger, highlighting the problem:
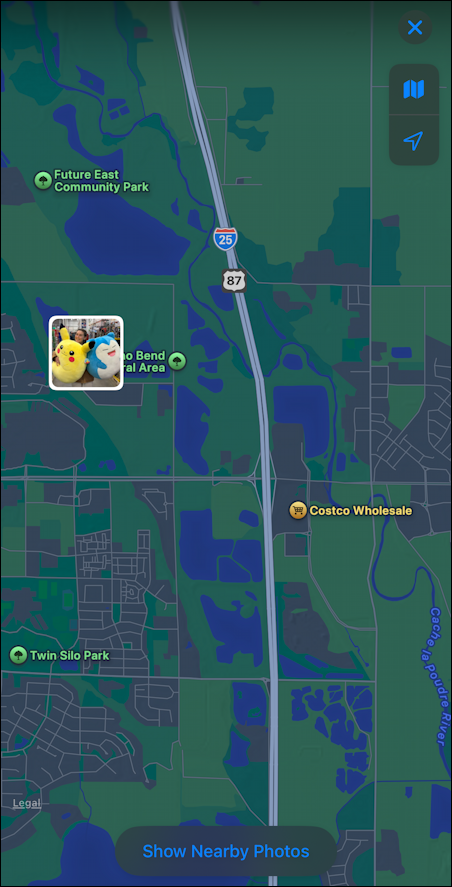
According to iOS, we took this photo at someone’s house, and Costco Wholesale is a ways away. That’s wrong; I captured this image at Costco!
HOW TO FIX AN INACCURATE LOCATION
To update the location associated with this photo, I’ll need to go back to the general information view rather than the map view (a tap on the “x” in the top right does the trick) and tap on “Adjust“. That offers this view:
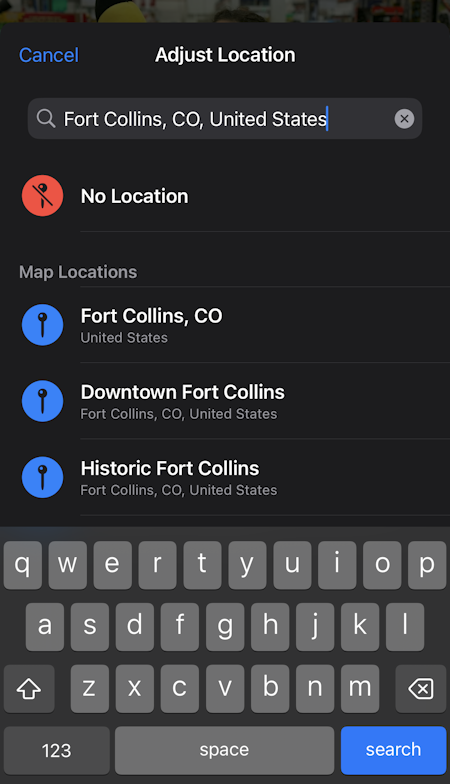
To strip out location information, a tap on “No Location” does the job. Worth remembering for privacy, especially with photos taken at home. For this task, however, I’m going to move to the beginning of the location input area and prepend “Costco”:
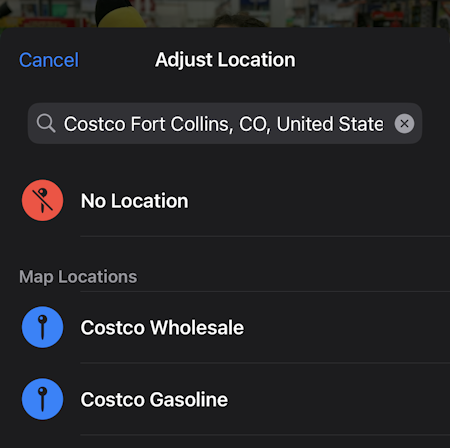
Notice that the locations offered are now Costco Wholesale and Costco Gasoline. Handy having them already in the iPhone’s location database. The first is indeed the correct choice, and a tap confirms.
Now the information area shows the correct location on the map!
Not too onerous, right?
LET’S MAKE IT A STICKER!
While we’re looking at this cute photo, I’d like to extract the two Pokemon and my daughter from the background and turn it into a Sticker that I can then use just like an emoji. Easy to do: while viewing the photo, tap and hold on the main subject. A highlight line will circle the image it’s selected…
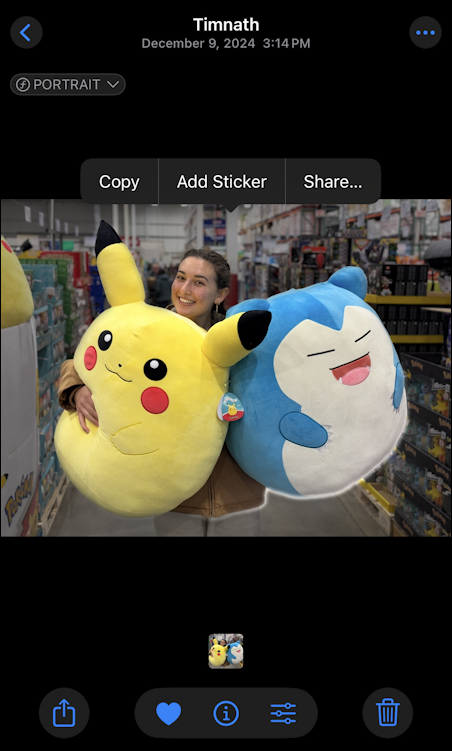
You can see the highlight on the lower right.
More importantly, notice the tiny menu that’s popped up: Copy, Add Sticker, Share… I’ll tap on “Add Sticker” and it’s added to my gallery of Stickers:
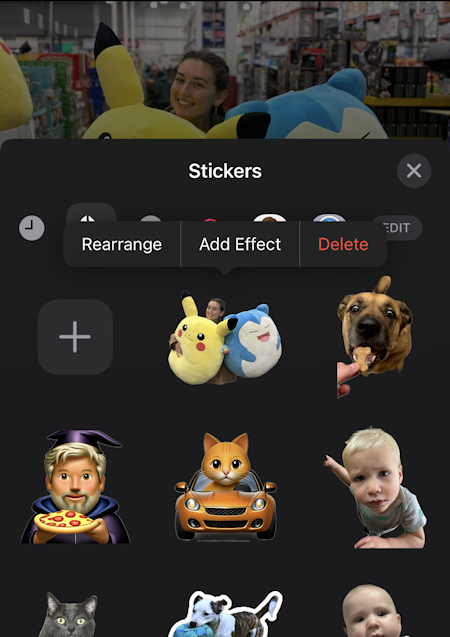
Since it’s still selected, however, I also see another mini menu: Rearrange, Add Effect, or Delete. I’ll choose Add Effect:
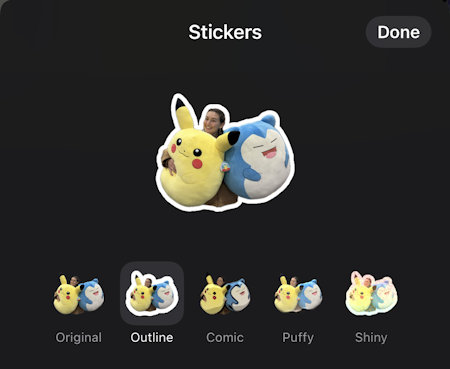
It’s a bit hard to see, but you can choose Outline, Comic, Puffy, Shiny, or Original as the Sticker style. I generally pick Outline since it looks better to me. Fun, right? And, with a tap on “Done“, it’s ready for me to use in text messages, email, even social media posts.
Pro Tip: I’ve been writing about the iPhone extensively since the release of the iPhone 1, please check out my iPhone help area while you’re here!