I run a Plex Media Server in my home for my family and it works great. Except if the Internet’s out, we can’t get to our server, even though they’re all on the same network. Why not? How can I allow offline access to the server?
The Plex Media Server is one of the best examples of the evolution of open source software, a powerful media server that can give you essentially your own personal streaming network. Move over HBO Max, get outta the way Netflix, Plex is in town! You already know this since you’re running a server, but with clients available on most smart TVs, streaming boxes, and all mobile devices, a Plex server allows anyone to access any of your available content anytime, from anywhere.
As I’ve written about before, I have a Plex Media Server running in my house too, with over 500 movies and 50+ TV series accessible, along with a photo archive and various other interesting content. You can get it all set up without paying a dime too, though I long ago purchased a Plex Lifetime Pass to support the development team. Learn more at plex.tv if you’re new to this.
The problem that many people encounter with their Plex setup, however, is just what you describe: The Internet goes down and even though your AppleTV or Android tablet are on the same local network as your Plex server, they can’t connect. By default, Plex apps always want to “phone home” to confirm the status of Plex accounts, which is fine when you’re online, but not so much when you aren’t able to access the ‘net.
Fortunately, there’s a fix and it’s one worth setting up while you’re online rather than waiting until you’re offline and thrashing with text-based configuration files. Trust me, you don’t want to do that.
NOAUTH ACCESS TO A PLEX SERVER
Start by connecting to your Plex server and opening up the administrative interface. Generally this is accessed by clicking on the wrench icon on the top right of your Plex admin screen (which is accessed through your Web browser).
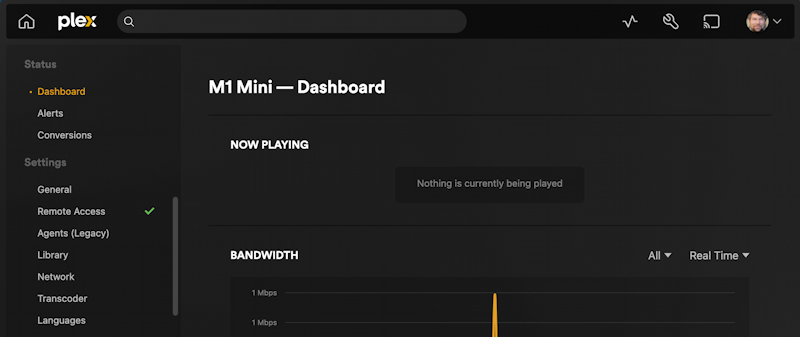
You’ll typically start out with a view of the Dashboard that includes what’s currently playing, server usage, and various other interesting stats and information, as shown above. Notice above the green check adjacent to “Remote Access” too. This indicates that the server’s all set up for remote access from anywhere in the world. Handy!
On the left side, locate and click on “Network“.
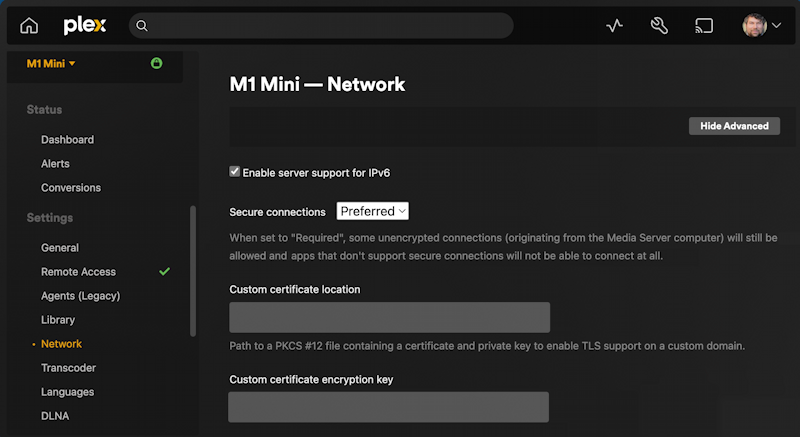
If you see a button on the right labeled “Show Advanced” you’ll want to click on it. The settings we’ll be changing are advanced, not the usual set of options for a Plex Media Server…
Scroll down until you find this input box; “List of IP addresses and networks that are allowed without auth”:

If you have fixed IP addresses and a stable network, you can actually type in individual IP addresses, which look like 125.15.3.110. Most times, however, your devices are being given addresses more dynamically on your network so the smarter move is to allow a range of IP addresses. Using the previous example, it’d be better to allow everything that matches 125.15.3.*, for example.
But what’s the IP address of the client devices you want to allow? Even with the range you still need one IP address as the starting point!
HOW TO FIND AN IP ADDRESS
Internet Protocol (IP) addresses can be found in the network configuration of all online devices. For example, on my MacBook, I can go into System Settings > Wi-Fi > Details and find this information:
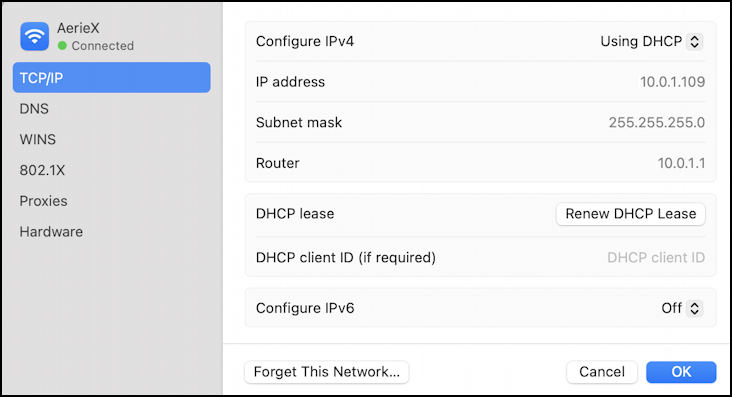
Here you can see that the system’s assigned IP address is 10.0.1.109, that the subnet mask is 255.255.255.0, and that the router is at 10.0.1.1. Your subnet mask will always be the same, and the router is almost always at “.1” of the IP address block. The information of interest: 10.0.1.109.
On a Windows computer, you can find this in Settings > Network. Whether you’re connecting via Wi-Fi or a hardwired connection like Ethernet, every device online has its own IP address:
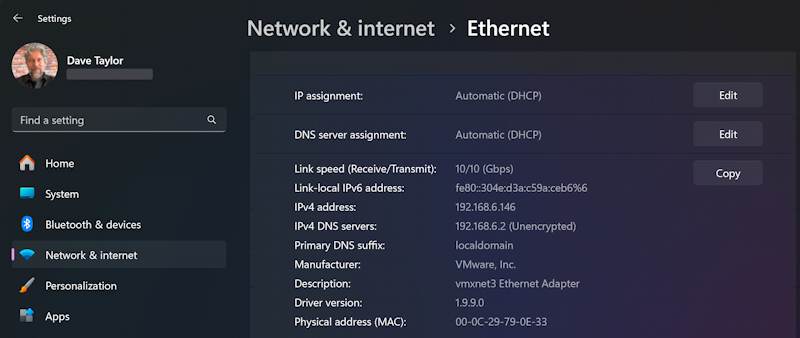
This is on a different network, so you can see it has the IPv4 address 192.168.6.146. Everything else can be safely ignored.
Armed with the IP address of one device on your local network – it can even be your server – you can then convert that into the data format expected by Plex. Remember, our base IP address was that revealed on the Mac, 10.0.1.109. Therefore…

In other words, you want to include the first three values of the IP address – 10.0.1 – followed by a ‘1’ if you want every possible device to be included, or a ‘2’ if you want to omit the router, which should definitely never be trying to access your Plex Media Server!
The second part is that same address mask we saw earlier: 255.255.255.0. Combined it’s the weird Plex way of saying “10.0.1.*” (with the exception of it also excluding 10.0.1.1).
Save that configuration page and you’ve done everything you need on the server. Next…
SPECIFY A PLEX CLIENT SKIP AUTH FOR SERVER
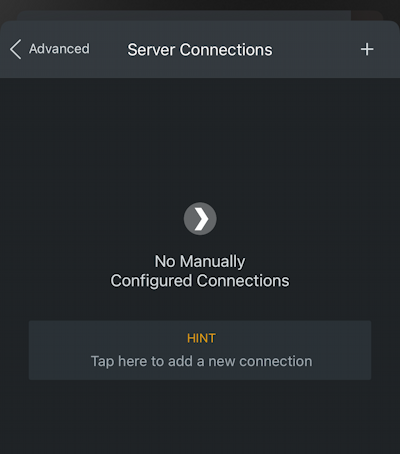
The other side of this task is that, once per client app, you need to go into Settings and specify that you now have a server that doesn’t require access authorization if you’re on that same network. I’ll use the iPhone Plex app as an example. In the Plex app, tap on the three-horizontal-line button on the top left, then the gear icon on the top right of the subsequent menu. You’ll want to then tap on “Advanced” from the list of possible settings, and then “Sever Connections“, which reveals this:
As a slight sidetrack, you’re going to need the IP address of your server. Easiest is to just go to that computer and find its IP address in a process entirely analogous to what I showed earlier. My server is also a Mac, so I use System Settings > Network > Details:
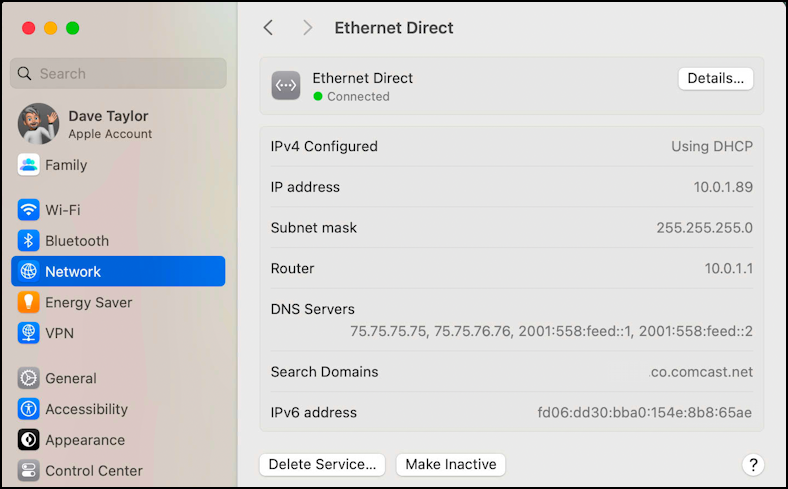
The server’s at 10.0.1.89. Got it. Now, tap on the “Tap here to add a new connection” in the Plex client app. In this instance, my iPhone app.
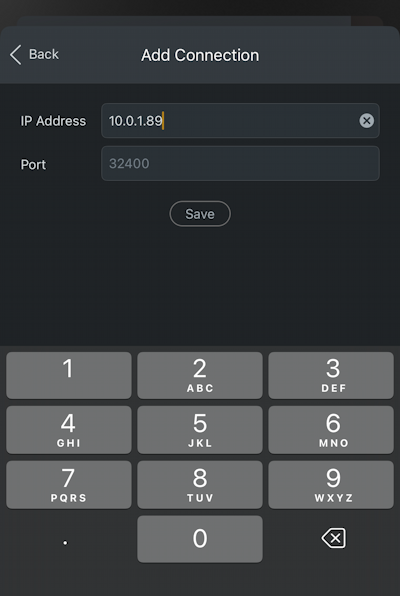
By default the Plex Media Server works on port 32400 so unless you’ve changed that, all you need to enter is the IP address of your Plex server, as shown above.
That’s it. Tap on “Save” and now you’ll see something just like this:
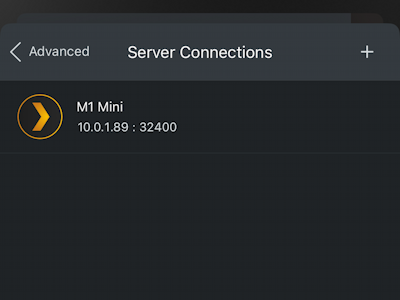
That’s it. Your server now supports noauth client connections on the local subnet, and you now also know how to go into your Plex client apps and enter the IP address of the updated server so you can access it even when you’re offline. Enjoy!
Pro Tip: I’ve been running and sporadically writing about my Plex server for quite a while. You can find the articles in my Computers & Internet Basics area if you’d like to read more while you’re visiting!
