
My knitting club wants to list our next event on Facebook for people to learn about and hopefully expand our attendance a bit. I use Facebook but have no idea how to create a public event! Can you help out?
If there’s one truism of social networks it’s that over time all of them seem to expand to encompass more and more features and capabilities. Photo sharing becomes video sharing, adds shopping links, becomes a market, evolves into an auction site, adds dating, and pretty soon it’s indistinguishable from all the other myriad of social networks and channels online. Such is the way of software as a service, I surmise, and it’s no surprise to anyone that Facebook, the flagship product from Meta, has a million and one features and capabilities. Including an entire calendar and scheduling feature that includes RSVPs, discussion areas dedicated to events, and much more. Finding and figuring it out? Not so easy.
Fortunately, you’ve asked at a good time; I was poised to add an event to my own Facebook universe, so can walk you through all the steps. I co-host an entrepreneurial networking group in Longmont, Colorado (about 45 minutes WNW from Denver) and we would like a few new faces to show up too! Here’s what I did to create our next event on Facebook…
FINDING EVENTS ON FACEBOOK
It’s not too hard to find a list of Events on Facebook as it’s one of the links on the left side of the browser (you might need to click on “See more” for it to appear) but that’s not where you create events. Not sure why there’s no button there, but that’s how it is. Instead, click on the 3×3 grid icon on the top right:
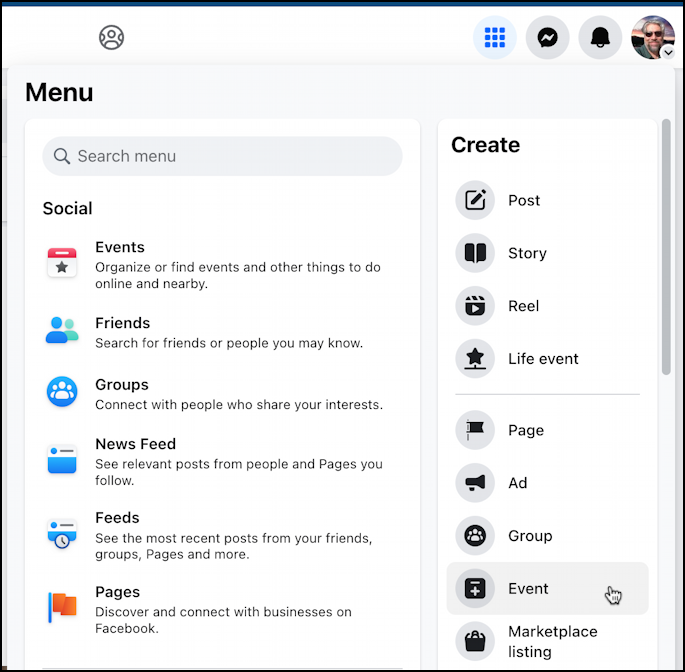
Notice that one of the choices is “Event” on the lower right of the resultant menu. When I click on it, I get to this template:
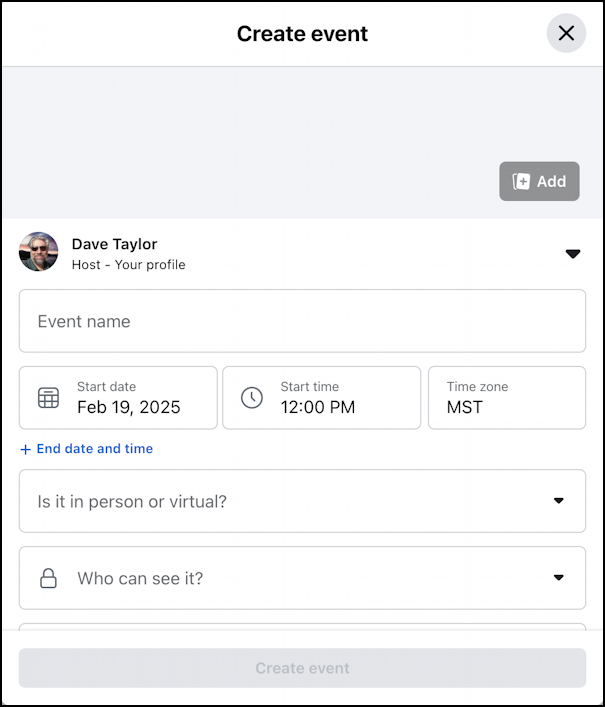
This is pretty much what you’d expect from an event manager: event name, date, time, duration, location, visibility, etc. To start, I always recommend adding a fun and engaging photo that will make people want to attend. AI can be a good option for an event image that has more generic people rather than specific individuals who might be concerned about privacy.
FILLING IN THE EVENT TEMPLATE
I start by clicking “Add” and specifying my AI-generated image. It’s obviously a drawing but I think it’s fun and engaging.
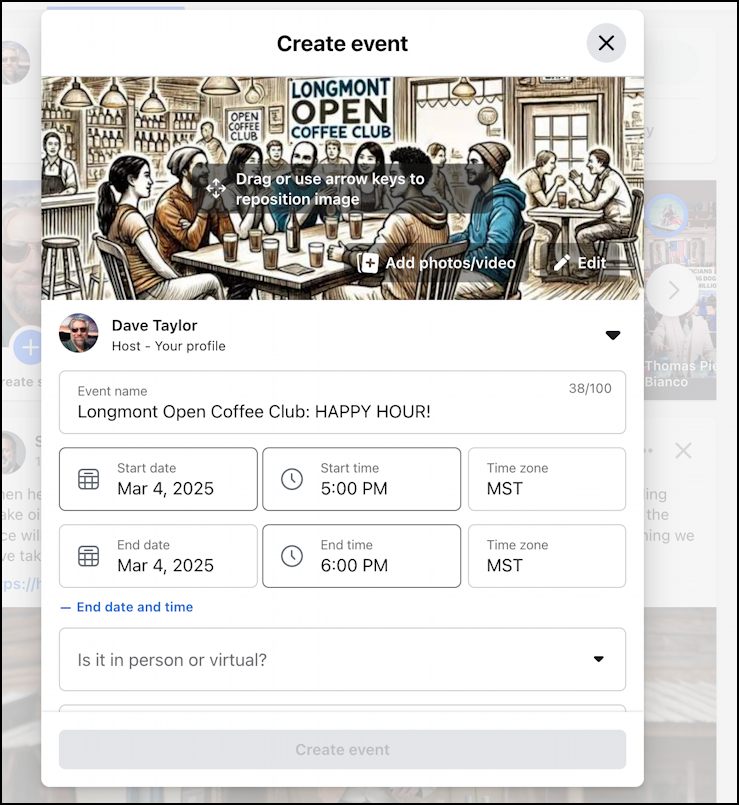
You can see that I’ve also specified both the event name and the start and end date and time. Tip: click on “+ End date and time” to get the second date/time fields to appear if they aren’t showing.
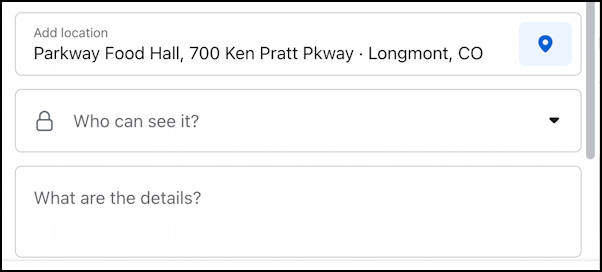
Next up, location. This is where I hit a small snag:
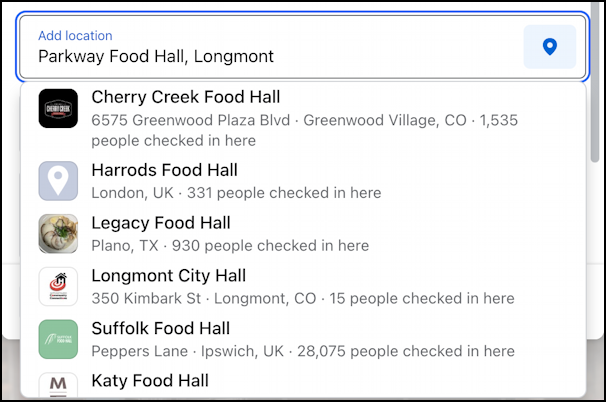
Parkway Food Hall has a Facebook page, but it’s not a known address, so there are no matches being suggested. Typically a public place will have a match that you can select which then automatically adds all the street address information. Since this isn’t matched, I just add the street address manually and hope people can figure it out:
Next up is visibility. Facebook offers a fair number of options considering the billions of daily users on the service. Click on “Who can see it?”:

Remember that Public is essentially anyone on the entire Internet, even people who don’t have an account on Facebook. This is why I recommend against ever having an event hosted at someone’s home listed as a public event. You can specify only friends, which probably won’t allow people you don’t yet know to see the event. Group is interesting, however. If you already have a group for your knitting club, you can specify that he event be only visible to people within the group. Me? I choose “Public”.
RECURRING EVENTS? CAN DO.
We meet at the same place every four weeks for a happy hour social so I’m going to specify that on Facebook so it shows up in a month or two without me having to remember to set things up each time. That’s done by choosing “Repeat event”:

I’ll choose “Custom” to have it be every four weeks, but unfortunately, that’s not an option. No worries, instead, I simply choose the recurring schedule for the next few months: Every four weeks:
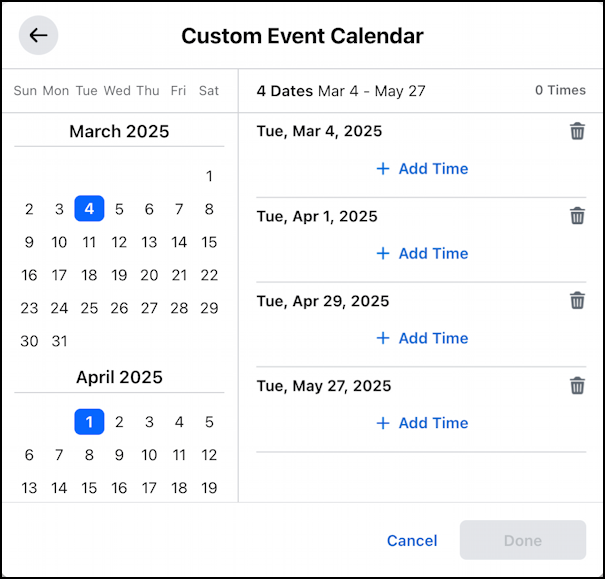
It won’t let you save this until you also specify a time, so “+ Add Time” is the next click, and it allows you to specify the same time for all of the future events. Easy enough.
ADDITIONAL SETTINGS AND PUBLISHING THE EVENT
Just about done. The event has a title, location, date, time, and I’ve also written a few sentences into the “What are the details?” box too. I’ve specified the recurrence, as you saw above, so now it’s time to have a quick glance at Additional settings:
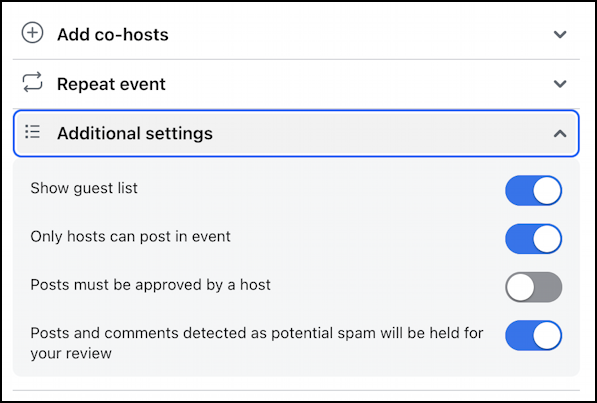
These are all pretty self-explanatory, and given the global reach of Facebook, I would never suggest that you open it up to all posters. You’ll inevitably get scammers and spammers, which can alienate potential attendees.
Ready to publish it? Click “Done” on the lower right!
Now you can optionally invite your Facebook friends to the event, as desired:
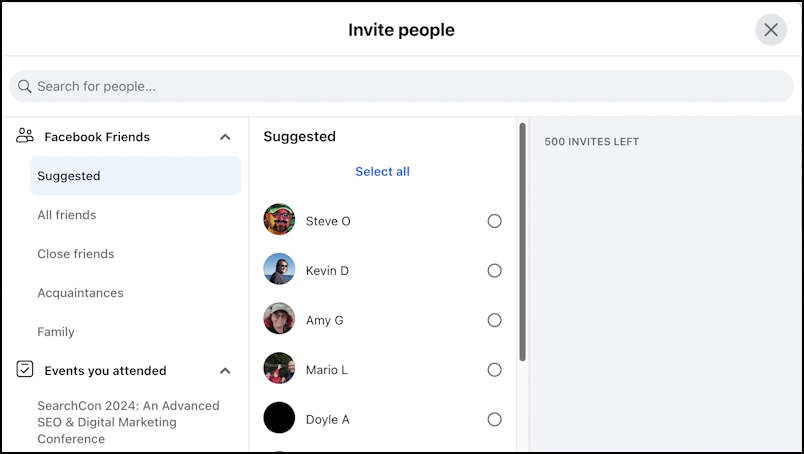
This can be pretty spammy if you invite hundreds of people who aren’t a good match, aren’t in the area, or aren’t fans of knitting, so I encourage you to use this feature judiciously. Notice you can invite people whoa attended a similar event too (in the above, you can see SearchCon 2024 is listed: That was an event I attended, not one I helped organize).
Once published, it shows up as an actual event with its own URL on Facebook:
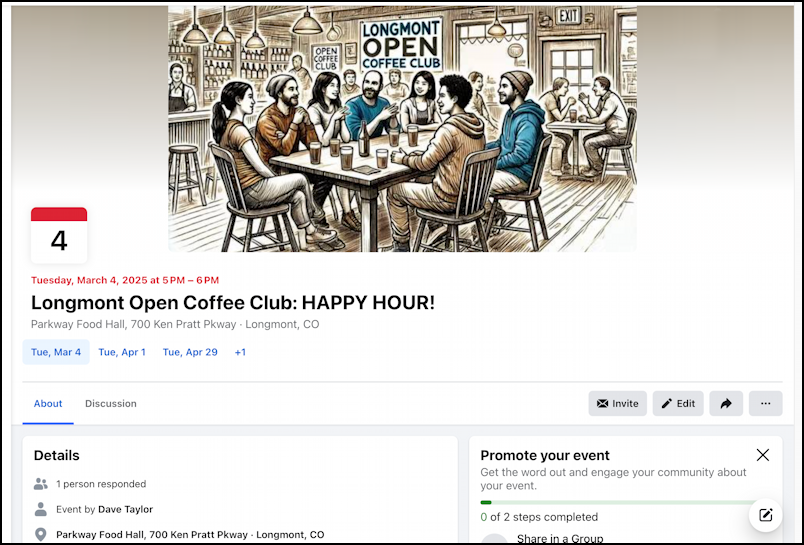
Neat, eh? Not only that, but if you go to the Events page, it’ll show up there too:
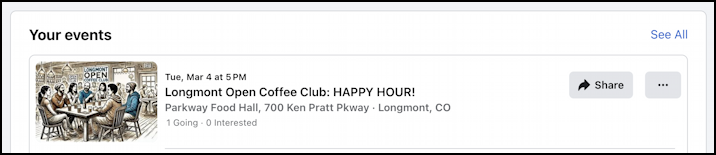
That’s it. Event created. Now try using the “Share” button to start raising visibility and hopefully gain some new knitters!
Pro Tip: I’ve been writing about Facebook for years and have an extensive Facebook help library. Please check out all my tutorials while you’re visiting, and don’t forget to subscribe to AskDaveTaylor on Facebook, where we post lots of exclusive content too!